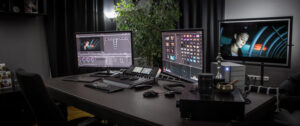
DaVinci Resolve is the world’s only solution that combines editing, color correction, visual effects, motion graphics, and audio post-production all in one software tool! Its elegant, modern interface is fast to learn and easy enough for new users, yet powerful for professionals.
DaVinci Resolve lets you work faster and at a higher quality because you don’t have to learn multiple apps or switch software for different tasks. That means you can work with camera original quality images throughout the entire process. It’s like having your own post-production studio in a single app! Best of all, by learning DaVinci Resolve, you’re learning how to use the exact same tools used by Hollywood professionals!
Recently Blackmagic Design released a new official video training series for DaVinci Resolve 17 that teaches how to edit, color grading, audio mixing, basic compositing to 3D motion design, etc with new features demonstration in DaVinci Resolve 17.
Blackmagic Design’s Official Training should be everyone’s first stop for learning Resolve. With a curriculum designed for new users and established professionals alike, Blackmagic Design certified training teaches you the skills you need to be more creative, work faster, and get the job done!
Edit Training
DaVinci Resolve is similar in many ways to other non-linear video editing software, but learning the particulars of this program will help you get started much more quickly. You can start here if you’re new to editing, but it is by no means only for beginners. There are also lots of advanced functions here that will help even experienced editors.
Introduction to Editing Part 1
In Part 1, you’ll learn about:
- Creating a New Project
- Importing Folders into the Media Pool
- Adding Bins to Organize Files
- Turning off Audio Scrubbing
- Tagging Your Media with Metadata
- Creating & Editing Smart Bins
- Importing Metadata from a CSV
- Searching for Media
- Adjusting User Settings for Automatic Smart Bins
- Re-naming clips with metadata variables
- Creating a New Timeline
- Playing Footage
- Adding Footage to Timeline
- Navigating the Timeline
- Showing Audio Waveform in Source Viewer
- Using In and Out points
- Inserting a Clip with only sound or only video
- Zooming in and out of the timeline
- Linked clips
- Blade Edit mode
- Trim Edit mode
- Adding music
- Place on top, append, and other ways to add footage
- Shuffle Edits to reorder clips
- Slip Edit using Trim Mode
- Adjusting Clip Speed
- Match Frame & Replace
To get the most out of these videos, and to follow along with the lessons shown, please download the example projects and media used from http://bmd.link/cox7Un.
Introduction to Editing Part 2
In part 2, you’ll learn about:
- Duplicating a Timeline for version control
- Adding additional tracks to the timeline
- Renaming & changing the color of tracks
- Inserting audio
- Toggle Snapping
- Inserting sound effects
- Adding clips to In and Out points on the timeline
- Muting tracks
- Using the audio mixer
- Changing audio track type
- Adding keyframes to audio volume
- Normalizing audio levels
- Adding fade in and outs on the audio
- Adding video transitions
- Inserting & Customizing Titles
- Playback with Full-Screen Viewer
To get the most out of these videos, and to follow along with the lessons shown, please download the example projects and media used from http://bmd.link/cox7Un.
Multicam Editing
To get the most out of these videos, and to follow along with the lessons shown, please download the example projects and media used from http://bmd.link/cox7Un.
Visual Effects in the Edit Page
To get the most out of these videos, and to follow along with the lessons shown, please download the example projects and media used from http://bmd.link/cox7Un.


